Getting Started
Starknet is a scalable layer 2 solution on Ethereum. This guide will walk you through the process of deploying and interacting with your first Starknet smart contract using the Cairo programming language, a general-purpose programming language for creating proofs of validity using Starknet. For experienced developers looking to understand the basics and gain hands-on experience, this guide provides step-by-step instructions and essential details.
We will use the Starknet Remix Plugin to compile, deploy, and interact with our smart contract. It's a great tool for getting started with Starknet development because you don't need to install anything on your computer.
- Visit the Remix IDE website with the Starknet plugin enabled.
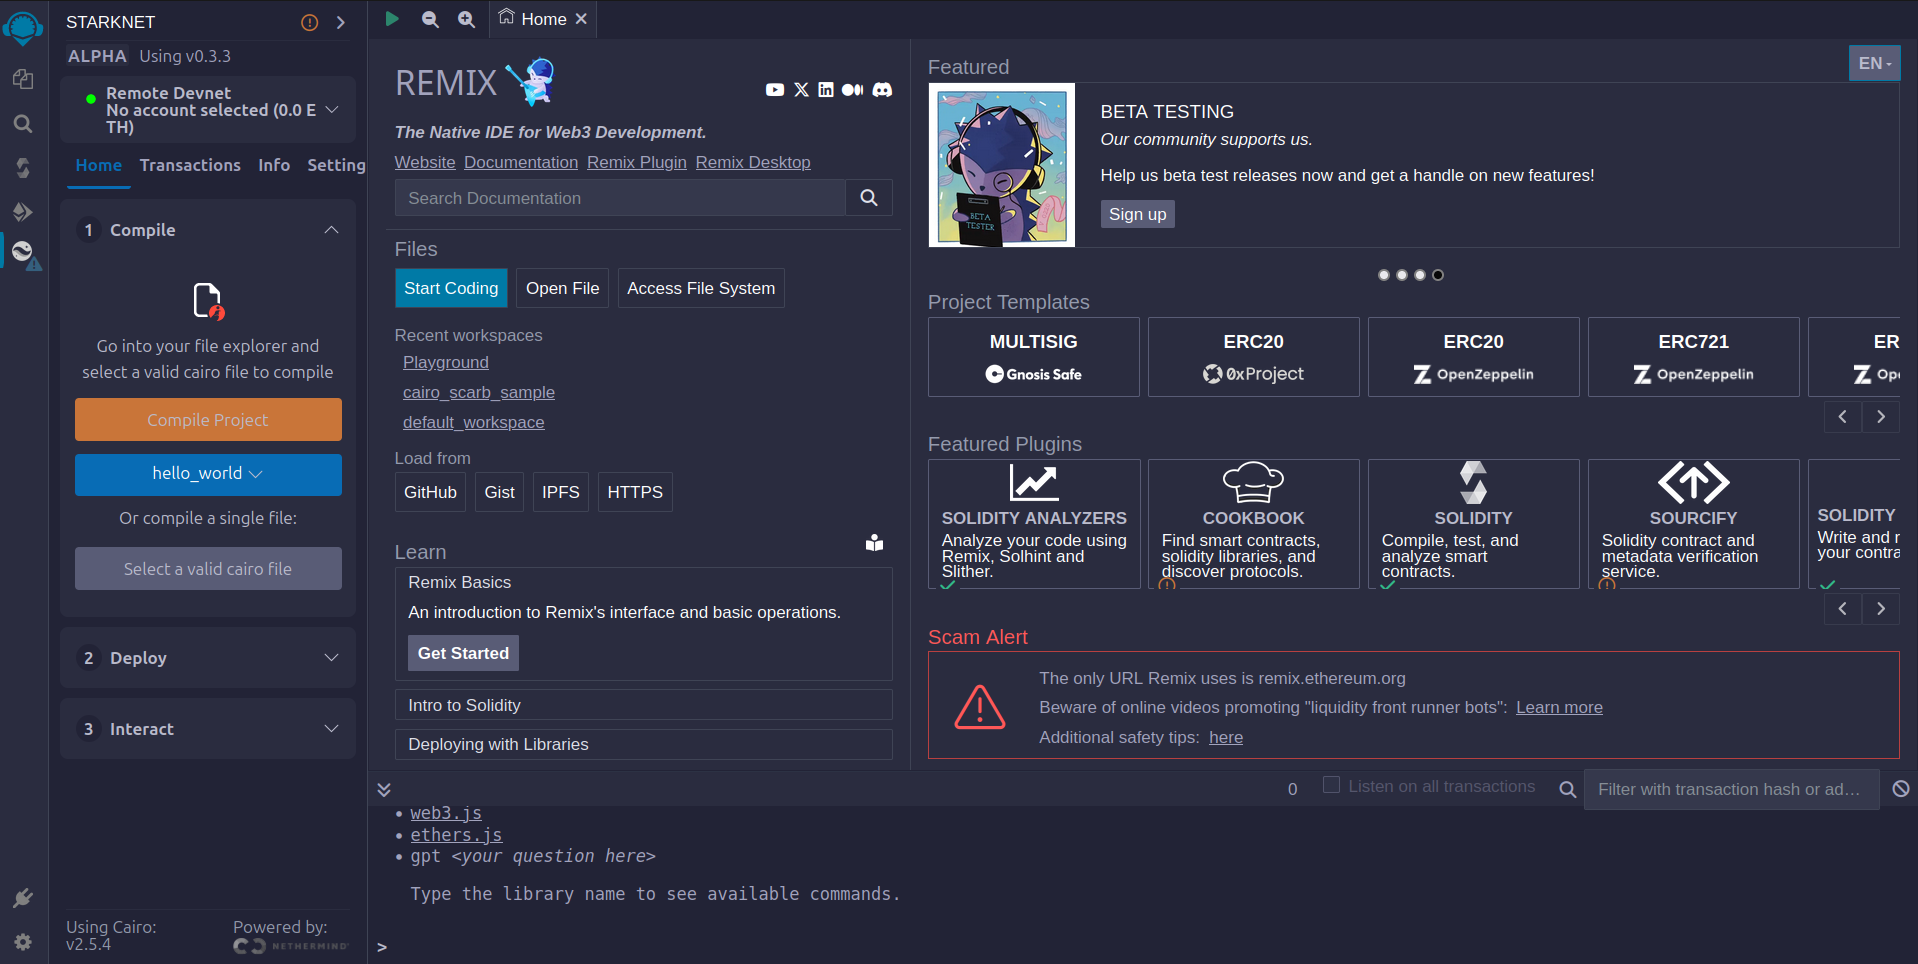
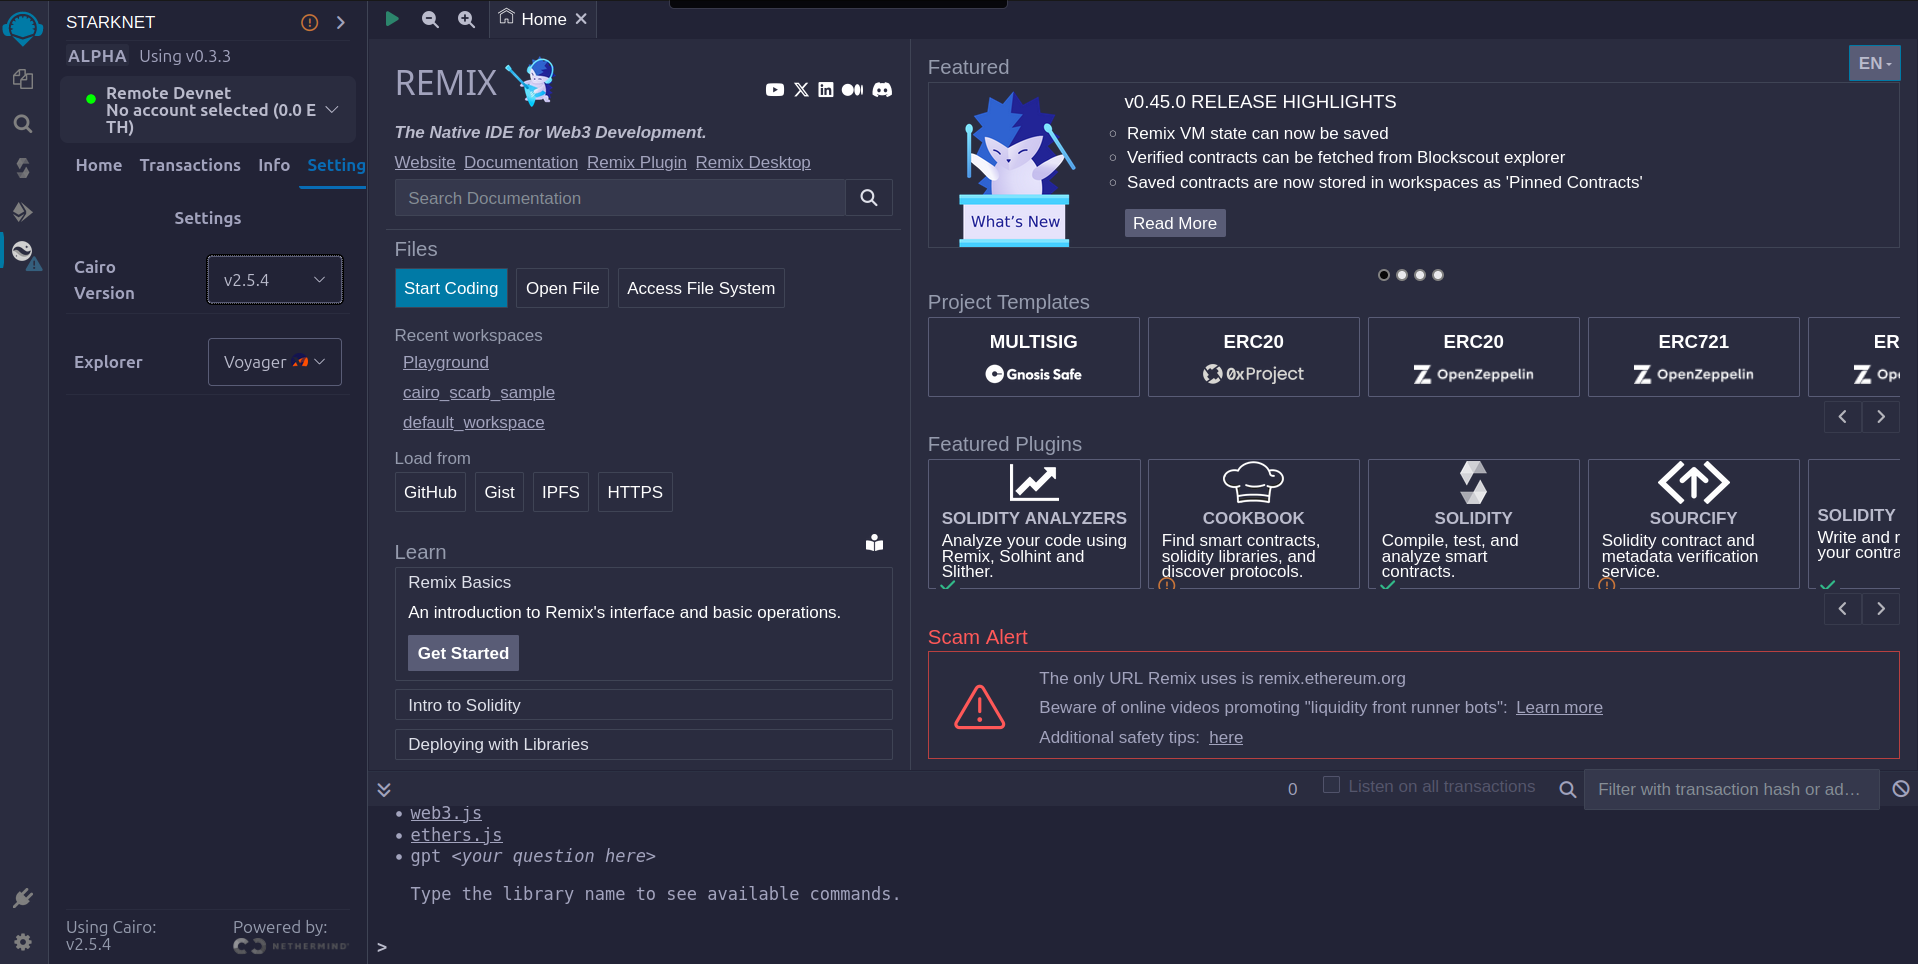
- Then go to settings option and choose the Cairo version as shown in the image below. The latest version available in Remix is
v2.5.4.
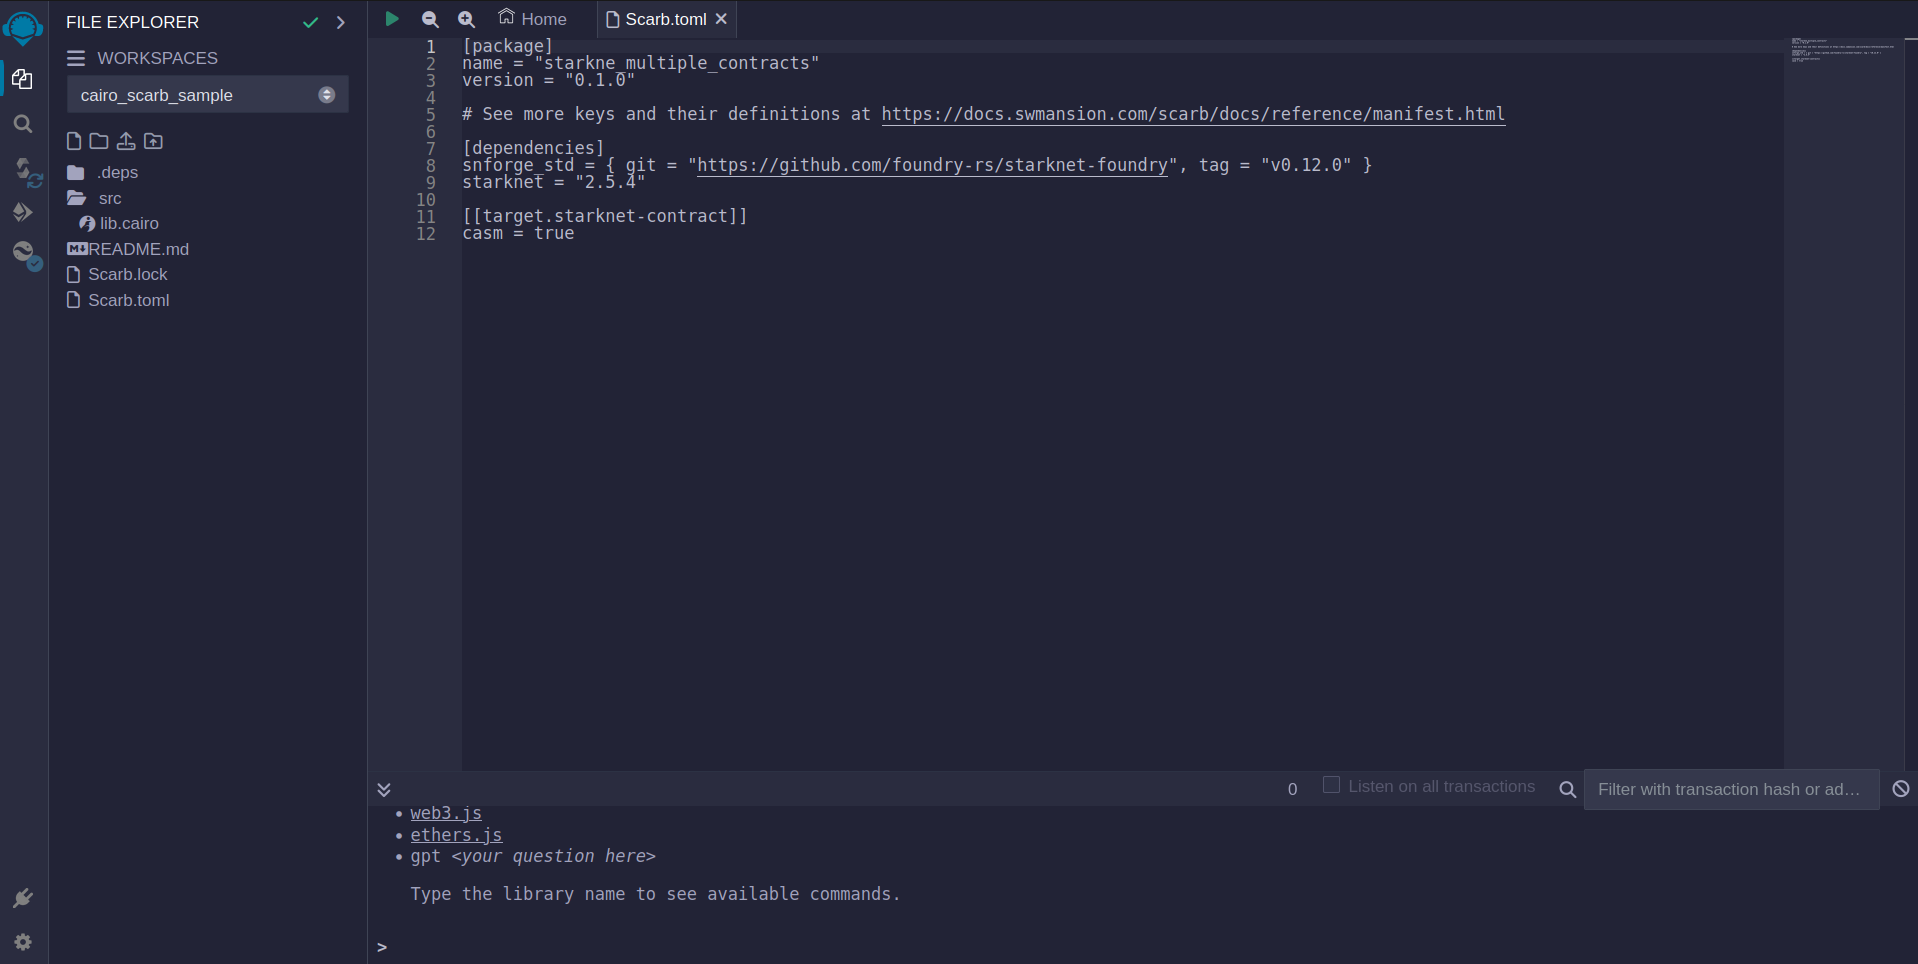
- Now click on the
file explorertab to check the sample project details. On theScarb.tomlfile you can find the version of this sample project. Since we want to use version 2.5.4 for this project, we have to verify that it matches in ourScarb.toml, otherwise modify to the correct version,starknet = "2.5.4".
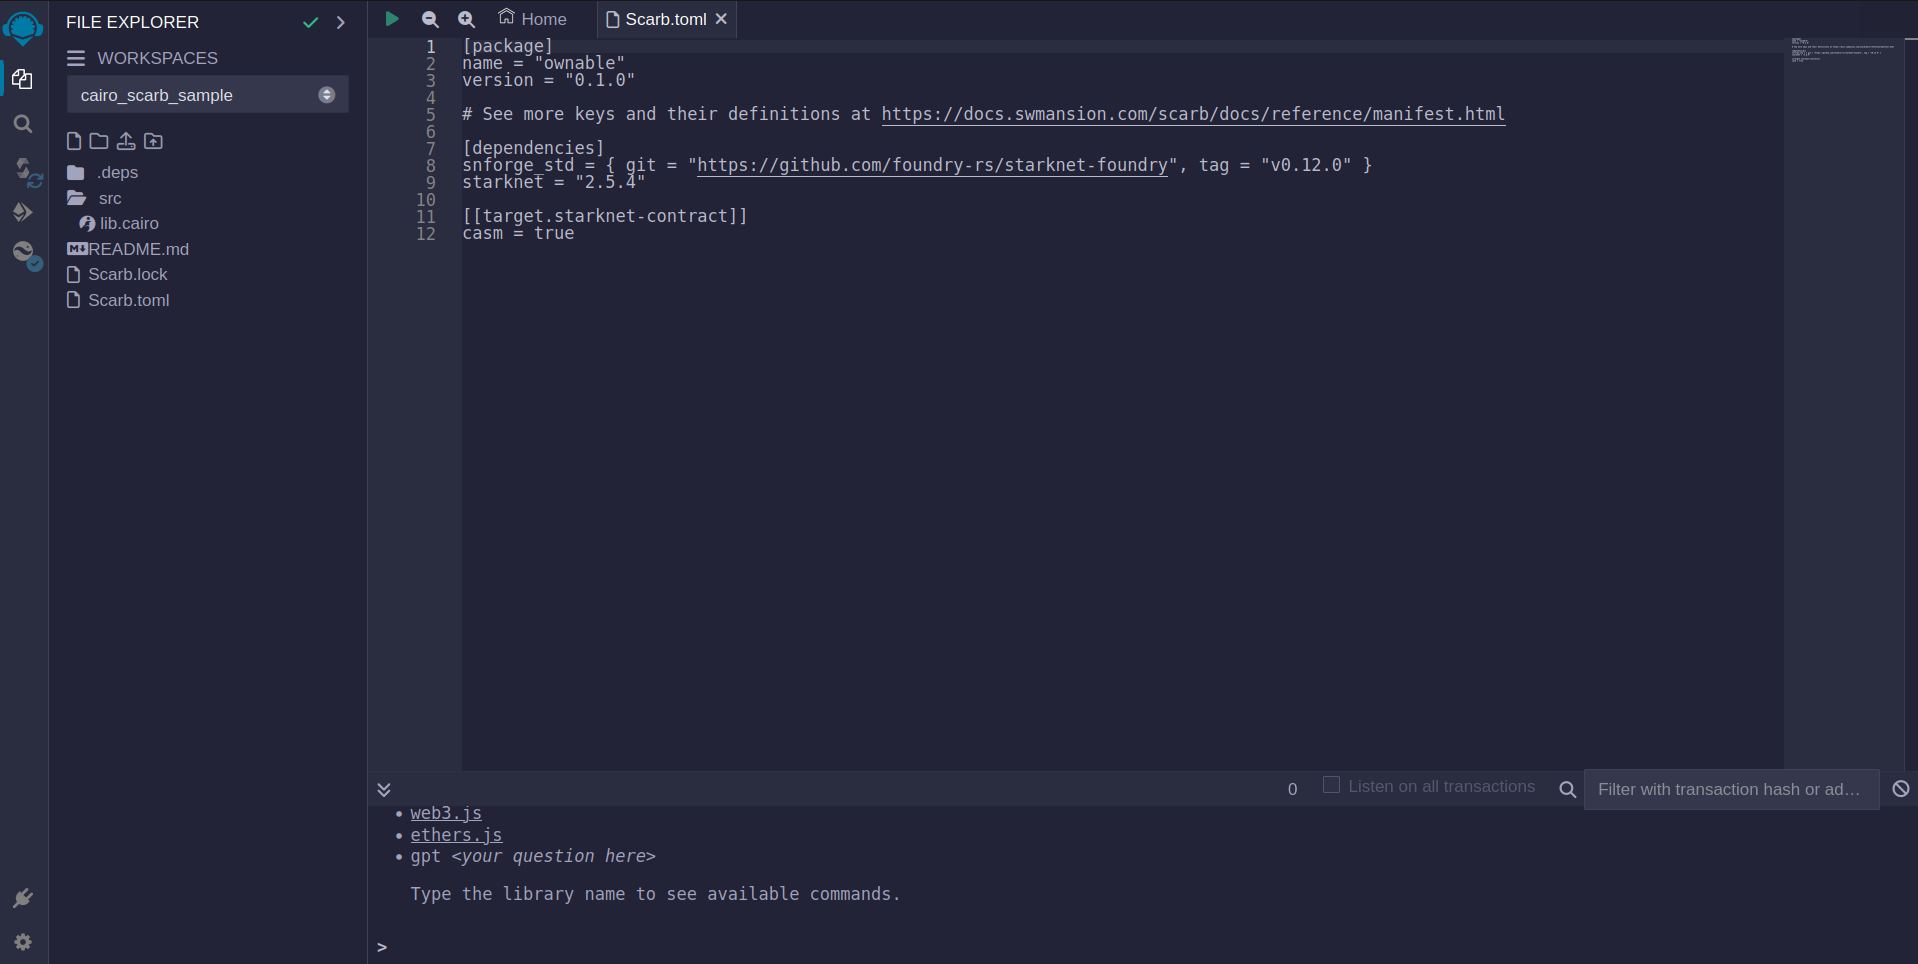
Clean your sample project
By default we got a sample project, however on this tutorial, we plan to show the Ownable contract example. To acomplish this we have to edit and delete some files and directories.
- Rename the root directory to
ownable. Go to yourScarb.toml, on [package] section, setnametoownable. - Delete
balance.cairoandforty_two.cairofiles, if present. - Go to
lib.cairoand remove all the content there. It should be empty.
At the end, your new project should look something like this.
Introduction to Starknet Smart Contracts
The script below is a simple Ownable contract pattern written in Cairo for Starknet. It features:
- An ownership system.
- A method to transfer ownership.
- A method to check the current owner.
- An event notification for ownership changes.
Cairo Example Contract
#![allow(unused)]
fn main() {
use starknet::ContractAddress;

#[starknet::interface]
trait OwnableTrait<T> {
    fn transfer_ownership(ref self: T, new_owner: ContractAddress);
    fn get_owner(self: @T) -> ContractAddress;
}

#[starknet::contract]
mod Ownable {
    use super::ContractAddress;
    use starknet::get_caller_address;

    #[event]
    #[derive(Drop, starknet::Event)]
    enum Event {
      OwnershipTransferred: OwnershipTransferred,
    }

    #[derive(Drop, starknet::Event)]
    struct OwnershipTransferred {
        #[key]
        prev_owner: ContractAddress,
        #[key]
        new_owner: ContractAddress,
    }

    #[storage]
    struct Storage {
        owner: ContractAddress,
    }

    #[constructor]
    fn constructor(ref self: ContractState, init_owner: ContractAddress) {
        self.owner.write(init_owner);
    }

    #[abi(embed_v0)]
    impl OwnableImpl of super::OwnableTrait<ContractState> {
        fn transfer_ownership(ref self: ContractState, new_owner: ContractAddress) {
            self.only_owner();
            let prev_owner = self.owner.read();
            self.owner.write(new_owner);
            self.emit(Event::OwnershipTransferred(OwnershipTransferred {
                prev_owner: prev_owner,
                new_owner: new_owner,
            }));
        }

        fn get_owner(self: @ContractState) -> ContractAddress {
            self.owner.read()
        }
    }

    #[generate_trait]
    impl PrivateMethods of PrivateMethodsTrait {
        fn only_owner(self: @ContractState) {
            let caller = get_caller_address();
            assert(caller == self.owner.read(), 'Caller is not the owner');
        }
    }
}
}
Components Breakdown
The following is a brief description of the components in the contract. We will get into more details when we get deeper into Cairo so feel free to skip this section for now if you are not familiar with smart contract development.
- Dependencies and Interface:
starknet::ContractAddress: Represents a Starknet contract address.OwnableTrait: Specifies functions for transferring and getting ownership.
- Events:
OwnershipTransferred: Indicates ownership change with previous and new owner details.
- Storage:
Storage: Holds the contract's state with the current owner's address.
- Constructor:
- Initializes the contract with a starting owner.
- External Functions:
- Functions for transferring ownership and retrieving the current owner's details.
- Private Methods:
only_owner: Validates if the caller is the current owner.
Compilation Process
To compile using Remix:
-
File Creation
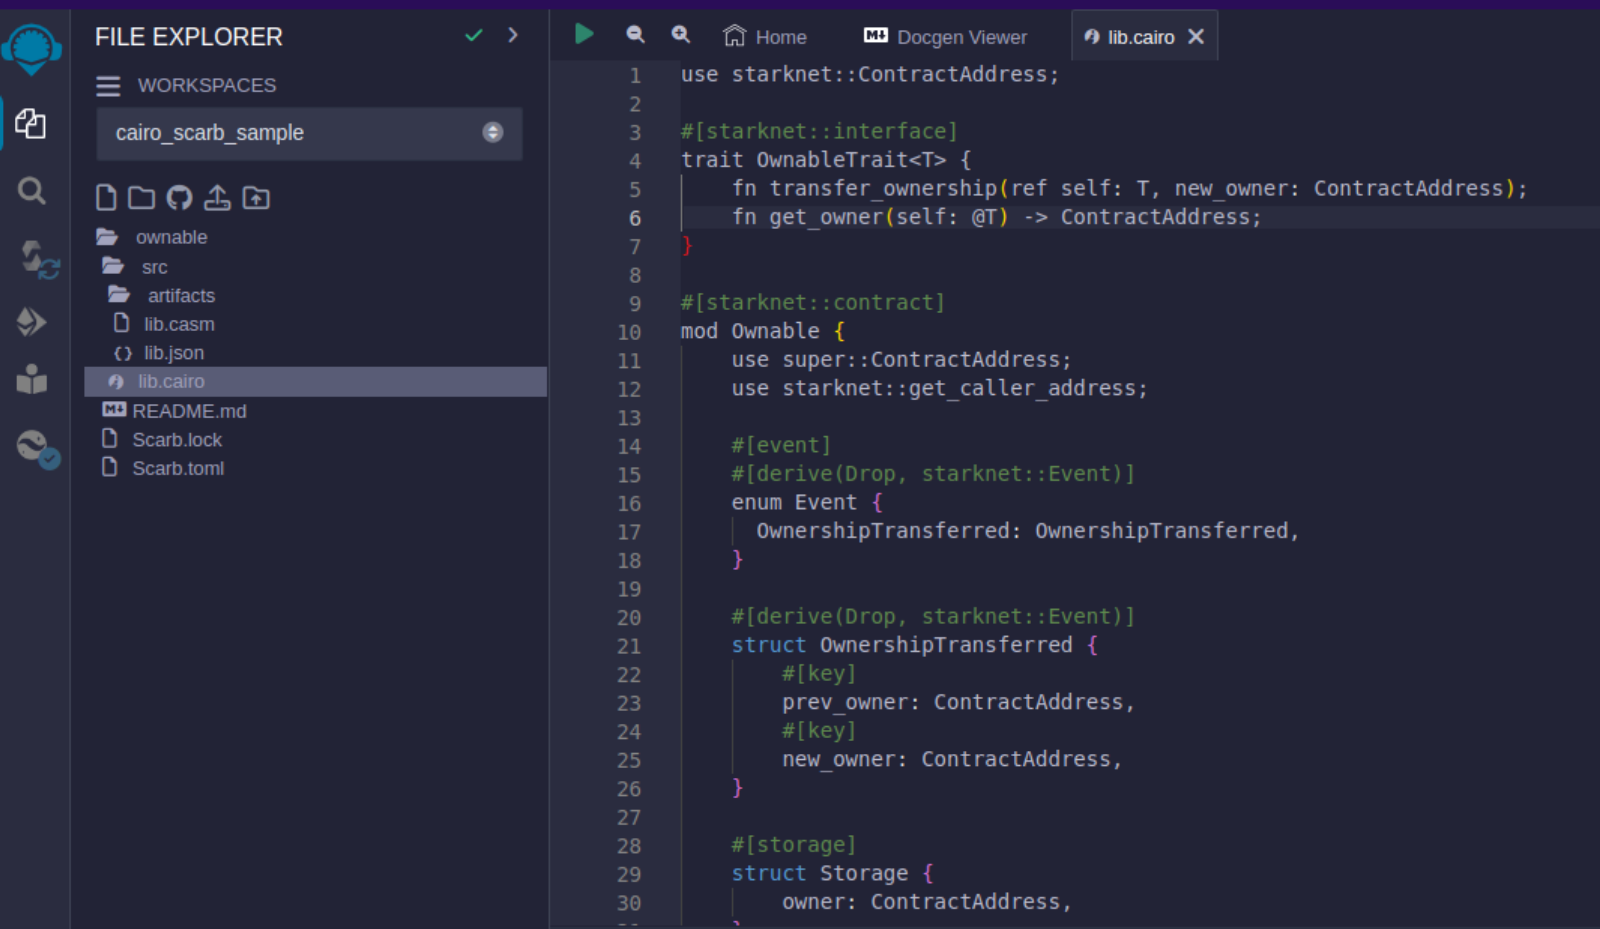
- Navigate to the "File Explorer" tab in Remix.
- Go to file named
lib.cairoand paste the previous code into it.
-
Compilation
- Navigate to the "Starknet" tab in Remix and click on
Home. - In the
1 Compilesection choosecompile a single file.
- Navigate to the "Starknet" tab in Remix and click on

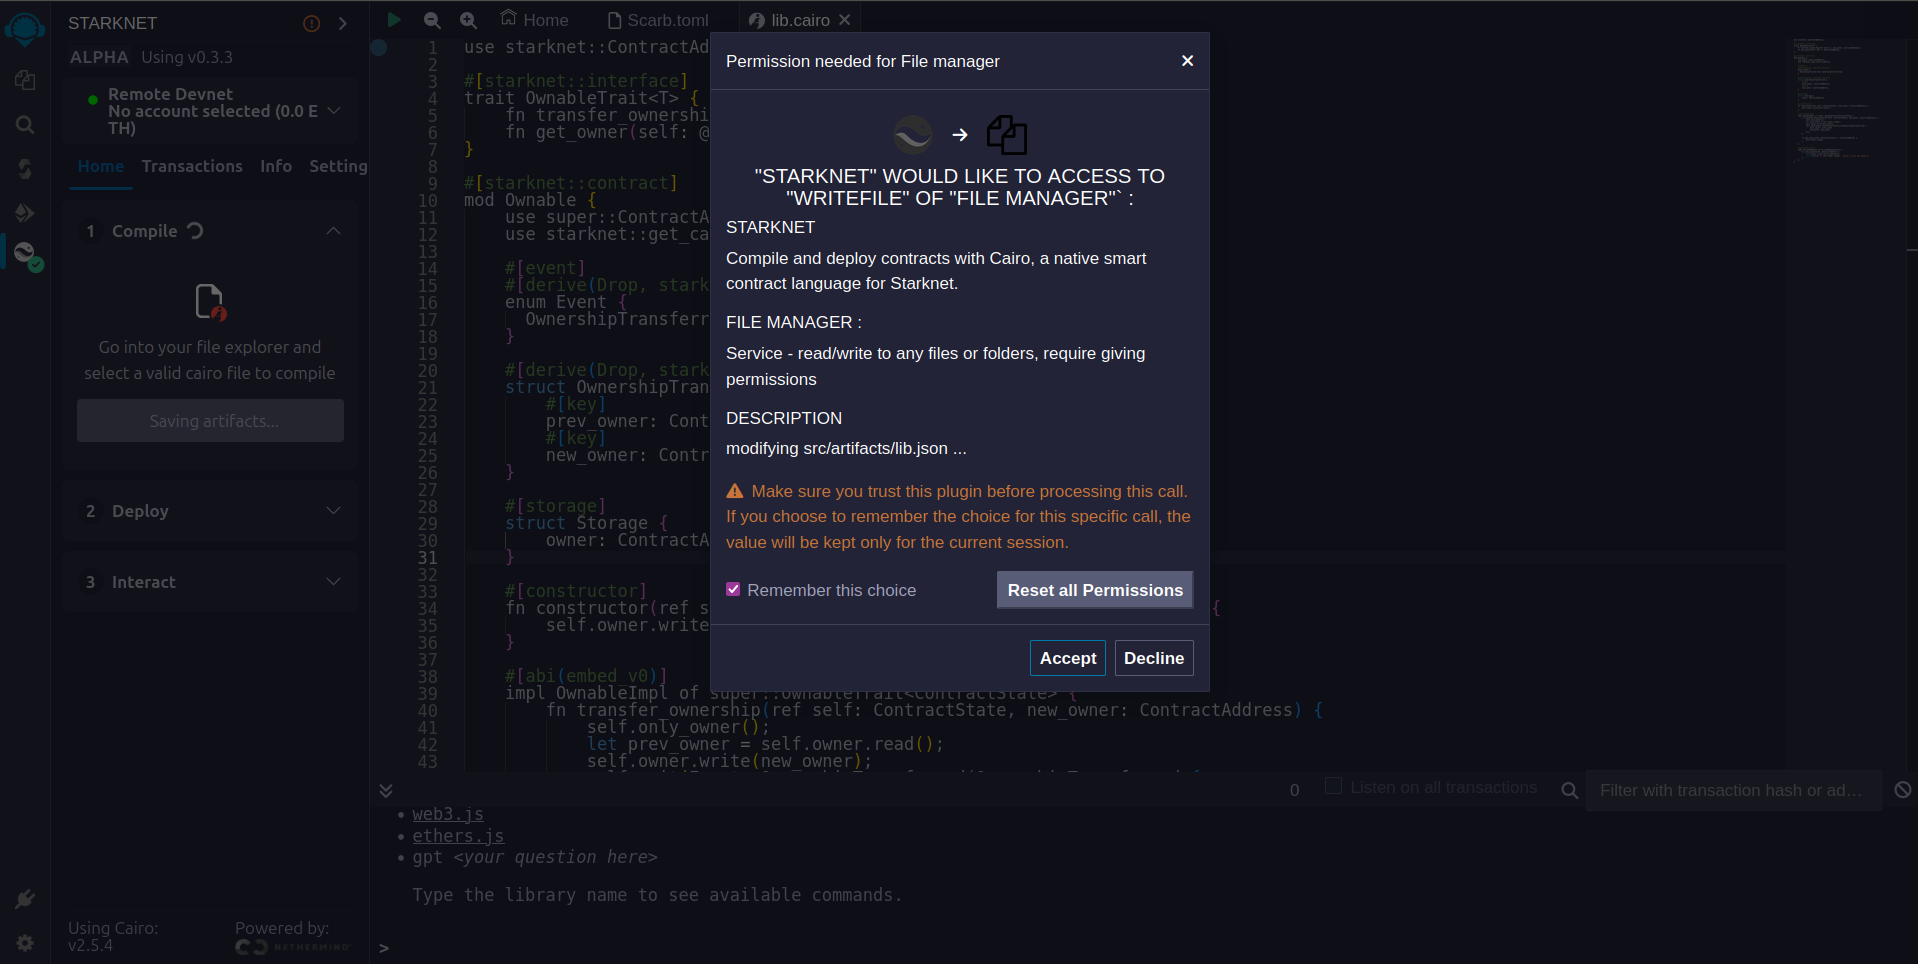
- Accept the permissions. Click
Remember my choiceto avoid this step in the future.
- Click on
Compile lib.cairo.

- Post-compilation, an "artifacts" folder emerges containing the compiled contract in two distinct formats: Sierra (JSON file) and CASM. For Starknet deployment, Remix will use the Sierra file. Do not worry about this process for now; we will cover it in detail in a later chapter. For now, Remix will handle the compilation and deployment for us.
Artifacts folder after compilation
Deployment on the Development Network
To set your smart contract in motion, an initial owner must be defined. The Constructor function needs this information.
Here's a step-by-step guide to deploying your smart contract on the development network:
-
Select the Appropriate Network
- In the Starknet tab, click on the top button
Remote Devnet.
- In the Starknet tab, click on the top button
-
Choose a Devnet Account
- Under "Devnet account selection", a list of accounts specific to the chosen devnet is presented.
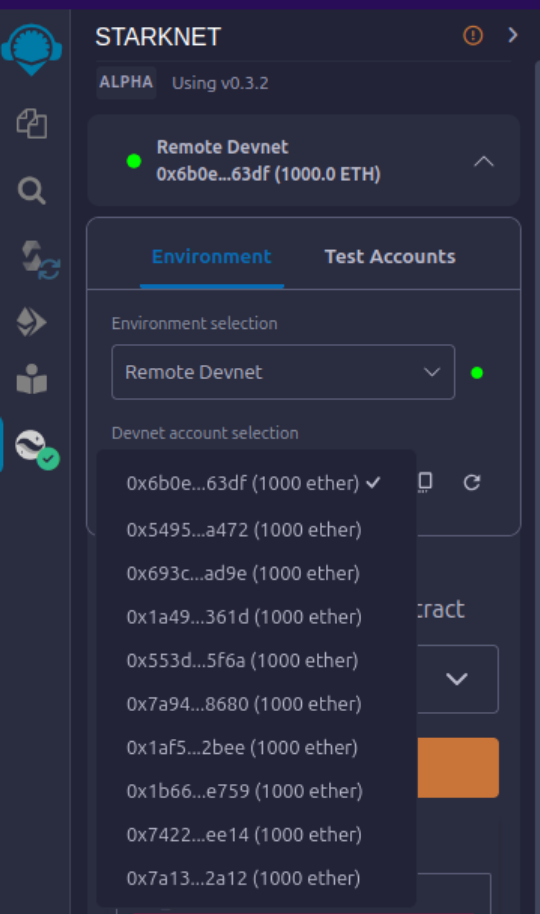
- Pick any account and copy its address.
-
Declare
- Click on "Declare lib.cairo"
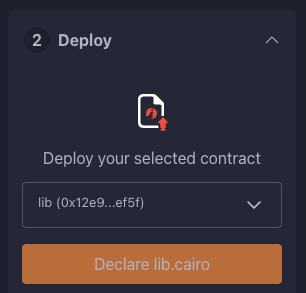
- Post-declared, Remix's terminal will send various logs. These logs provide crucial details, including:
transaction_hash: The unique hash of the transaction. This hash can be used to track the transaction's status.class_hash: The class hash is like the id of the definition of the smart contract.
------------------------ Declaring contract: ownable_Ownable ------------------------
{
  "transaction_hash": "0x36dabf43f4962c97cf67ba132fb520091f268e7e33477d77d01747eeb0d7b43",
  "class_hash": "0x540779cd109ad20f46cb36d8de1ce30c75469862b4dc75f2f29d1b4d1454f60"
}
---------------------- End Declaring contract: ownable_Ownable ----------------------
...
-
Initiating Deployment
- Input the copied address into the
init_ownervariable.
- Click on "Deploy".
- Input the copied address into the
Post-deployment, Remix's terminal will send various logs. These logs provide crucial details, including:
transaction_hash: The unique hash of the transaction. This hash can be used to track the transaction's status.contract_address: The address of the deployed contract. Use this address to interact with your contract.data: Contains theinit_owneraddress fed to the constructor.
{
  "transaction_hash": "0x624f5b9f57e53f6b5b62e588f0f949442172b3ad5d04f0827928b4d12c2fa58",
  "contract_address": [
    "0x699952dc736661d0ed573cd2b0956c80a1602169e034fdaa3515bfbc36d6410"
  ]
    ...
  "data": [
        "0x6b0ee6f418e47408cf56c6f98261c1c5693276943be12db9597b933d363df",
         ...
      ]
    ...
}
By following the above process, you will successfully deploy your smart contract on the development network.
Interaction with the Contract
With the contract now active on the development network, interaction becomes possible. Here's a guide to effectively interact with your contract on Starknet:
-
Initiating Interaction
- Navigate to the "Starknet" plugin tab.
- Select the "Interact" option.
-
Calling the
get_ownerFunction- Choose the
get_ownerfunction. Since this function doesn't require arguments, the calldata field remains blank. (This is a read function, hence calling it is termed as a "call".)
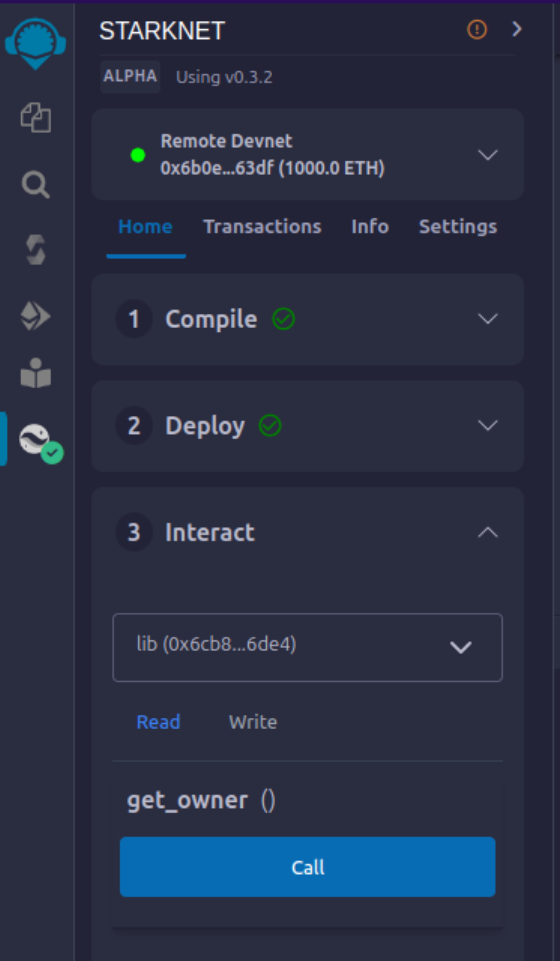
- Press the "Call" button. Your terminal will display the result, revealing the owner's address provided during the contract's deployment as calldata for the constructor:
- Choose the
{
  "resp": {
    "result": [
      "0x6b0ee6f418e47408cf56c6f98261c1c5693276943be12db9597b933d363df"
    ]
  },
  "contract": "lib.cairo",
  "function": "get_owner"
}
This call currently doesn't spend gas because the function does not change the state of the contract.
- Invoking the
transfer_ownershipFunction
- Choose the "Write" in the interaction area. Here you can see the functions that alter the contract's state.
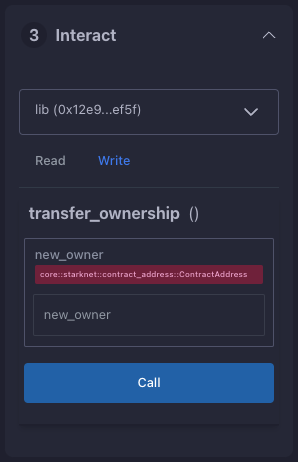
- In this case
transfer_ownershipfunction, which requires the new owner's address as input. - Enter this address into the
new_ownerfield. (For this, use any address from the "Devnet account selection" listed in the Environment tab.) - Click the "Call" button. The terminal then showcases the transaction hash indicating the contract's state alteration. Since we are altering the contract's state this type of interaction is called an "invoke" and needs to be signed by the account that is calling the function.
For these transactions, the terminal logs will exhibit a "status" variable, indicating the transaction's fate. If the status is "ACCEPTED_ON_L2", it means the Sequencer, the component that receives and processes transactions, has accepted the transaction, which is now awaiting inclusion in an upcoming block. However, a "REJECTED" status signifies the Sequencer's disapproval, and the transaction won't feature in the upcoming block. More often than not, this transaction gains acceptance, leading to a contract state modification. See this chapter for more on Starknet's architecture and the Sequencer. On calling the get_owner function again we get this:
{
  "resp": {
    "result": [
      "0x5495d56633745aa3b97bdb89c255d522e98fd2cb481974efe898560839aa472"
    ]
  },
  "contract": "lib.cairo",
  "function": "get_owner"
}
You've now adeptly compiled, deployed, and interacted with your inaugural Starknet smart contract. Well done!
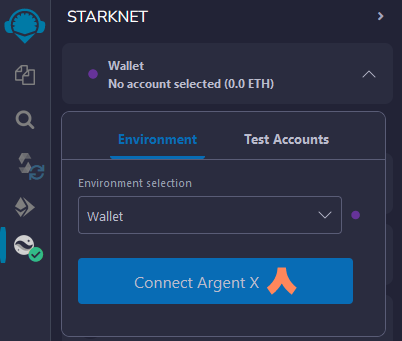
Deploying on Starknet Testnet
After testing your smart contract on a development network, it's time to deploy it to the Starknet Testnet. Starknet Testnet is a public platform available for everyone, ideal for testing smart contracts and collaborating with fellow developers.
First, you need to create a Starknet account.
Smart Wallet Setup
Before deploying your smart contract to Starknet, you must handle the transaction cost. While deploying to the Starknet Goerli Testnet is free, a smart wallet account is essential. You can set up a smart wallet using either:
Both are reliable Starknet wallets offering enhanced security and accessibility features thanks to the possibilities that the Cairo VM brings, such as Account Abstraction (keep reading the Book for more on this).
- Install the recommended chrome/brave extension for your chosen wallet.
- Follow your wallet provider's instructions to deploy your account.
- Use the Starknet Faucet to fund your account.
- Deploy the account to the network. This usually takes around 10 seconds.
Once set up, you're ready to deploy your smart contracts to the Starknet Testnet.
Deployment and Interaction
- Follow the previous deployment steps.
- In the 'Environment selection' tab, choose 'Wallet'.
- Select your Starknet account and continue with deploying and interacting with your contract.
You can monitor transaction hashes and addresses using any Starknet block explorers like:
These tools provide a visual representation of transactions and contract state alterations. Notably, when you alter the contract ownership using the transfer_ownership function, the event emitted by the contract appears in the block explorer. It's an effective method to track contract events.
Your Next Steps
Decide your direction from the following choices:
-
Deepen Your Starknet Knowledge: For an extensive grasp of Starknet's inner workings and potential use cases, delve into Chapter 3 of the Starknet Book. This chapter details Starknet’s architectural nuances. Then go ahead from there.
-
Dive into Cairo: If you're more attuned to coding and wish to craft Starknet contracts, then Cairo is essential. It stands as Starknet's core contract language. Begin with Chapters 1-6 of the Cairo Book, ranging from basics in Getting Started to more advanced aspects such as Enums and Pattern Matching. Conclude by navigating to the Starknet Smart Contracts chapter, ensuring you have a well-rounded understanding.